The Farmhouse

7 Tips for Beginning Gardeners

I’m so excited to have a guest blogger today. Thank you Jessica Quinn from Faithful Farmwife. Enjoy!

 Gardening is something that I have struggled with in previous years. This is because I didn’t take the proper steps to prepare myself and my garden for productive seasons. Looking back on my mistakes inspired me to share some tips with people who are just starting out on their gardening journey.

7 Tips for Beginning Gardeners

1. Find a Mentor

Anytime I start something new I make sure to seek out an expert in whatever it is that I am doing. We have mentors for gardening,dairy goats, honeybees, horses, pigs, chickens, fodder, rabbits, marriage, parenting, and pretty much everything else that we are involved in. You should pick a mentor who is willing to help, easily accessible (doesn’t take a month to call you back), and knowledgeable.

2. Research & Plan!


  • Find out what plants grow well in your USDA Hardiness Zone.
  •  

  • Decide which plants you want to grow.
       

    • Getting carried away with your veggie options is far too easy. Sure your family only eats lettuce, tomatoes, and cucumbers, but wouldn’t it be cool to have homegrown kohlrabi, cosmic purple carrots, and edamame? I am all for growing everything that you can, but when you are just starting out you really need to focus on no more than 5 plant varieties. Pick a few veggies that you know your family will eat & grow those. Add a couple more each year as you are comfortable.
    •  

    • Now decide if you want to go with organic, hybrid, or heirloom varieties. Maybe you want a mix…make that decision before starting on your seed order.
  •  

  • Garden Planning & Research Resources

7 Tips for Beginning Gardeners

3. Test & Amend the Soil

Contact your local Agriculture Extension office for a soil test kit. You pull samples, write down your info, send it in, and they send the results back to you. Or you can purchase your own soil test kit. Use these results to optimize your soil.
Find what your soil is lacking & add it. Too acidic? Add some lime, oyster shell, or wood ashes to raise the pH. Too alkaline? You can add common sulfur and lower the pH over time by adding organic material such as compost & manure.

4. Pick a reputable seed company

Research different seed companies to find the one that meets your specific needs. I recommend looking into these two companies:

Consider saving seeds for your next garden. This will save money & it increases your level of self-sufficiency.

5. Decide on pest & weed control

Are you going to hand pull weeds & remove pest manually? Will you use organic sprays & natural control methods? Are you okay with using non-organic weed & pest control? Look into these different methods & discuss them with your mentor to decide what is best for your garden.
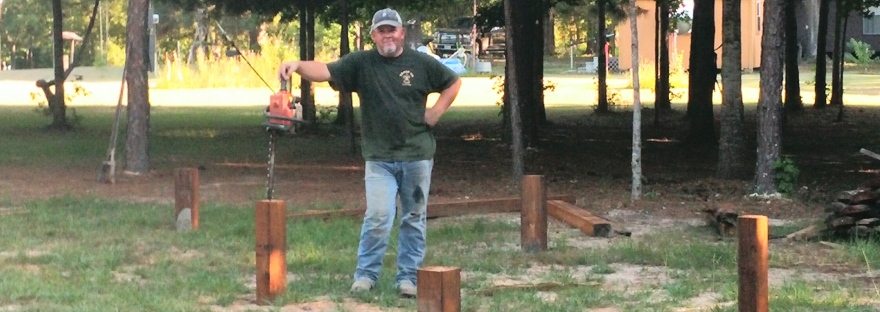
The photo below shows my husband & son pulling weeds in our 1/2 acre garden a couple of years ago. This was our first garden and it is the inspiration for most of my tips in this post. We planted way too many varieties, didn’t do enough research, didn’t amend the soil, and everything died except the okra…I am convinced that you can’t kill okra.

7 Tips for Beginning Gardeners

6. Make Your Own Compost

Most Co-Ops & garden stores carry compost & manure, but why buy it when you can make your own? Making compost does require a little extra research. You will need to be sure that the materials added to your bin are contributing to the recommended 30:1 Carbon to Nitrogen ratio. You can read more about making your own compost here.
Composting Materials for Your Garden

7. Don’t forget to water!

Sounds so commonsense, but I have killed more than one garden because I forgot to water my plants… Overwatering should also be avoided. Make sure that you check the watering needs of each plant that you have decided to grow and water accordingly. If you are planting in containers, be sure that your containers have drainage in the bottom so the soil doesn’t flood.
 
Are you a beginning gardener? What are your concerns for this year’s garden?
Are you a seasoned gardener? What tips would you add to this list?


Pin It!

7 Tips for Beginning Gardeners
 

7 Tips for Beginning Gardeners7 Tips for Beginning Gardeners

Jessica Quinn
faithfulfarmwife.com

The Farmhouse

Meat in the freezer

Well we finally did it. We put some meat in the freezer. Michael got a nice buck. Donna got a little cull (her first deer ever). We used this little inexpensive grinder.

image

After letting the meat bleed out for nearly a week in the cooler, we trimmed and cut into chunks.

After running thru the grinder once we ran some bacon thru the grinder. Instead of getting fat from a butcher just go buy the cheapest pack of bacon bits and pieces you can find. Something real fatty that you wouldn’t normally buy.

After running it thru grinder we mixed it with the deer meat and ran it back thru the grinder.

For the sausage we did the same prep work but added jalapeños, cream cheese and cheddar cheese as well as sausage seasonings. We made patty and link sausage.

Look at all this goodness! That’s 40lbs of burger meat, 10lbs of chili meat, 93 sausage patties and 15lbs of link sausage.  It’s so amazing to know we did it all ourselves!

Homesteading

Heaven on Earth

I have wanted goats for oh, at least 5-6 years. Problem #1 – no experience with them. Problem #2 – No place to put them.

Well, we came to a point building our house where we had to step away for a while. So needing to get out of the travel trailer, found a house in the country to rent for a while. The land is beautiful. And plenty of pasture!

So Michael and I start talking about wanting goats again. We start poring over Craigslist looking at them. Deciding what breed, how many etc. You know the planning stage.

We decide 3 or 4 goats will be great. I want something small, because they are so cute and that’s how I pick most of my animals, they have to reach at least a 9 on the cute-o-meter. So we go with Nigerian Dwarfs.

I find a lady who is leaving the country for a while and needs to sell her small herd. We agree that we will take 6 (already the power of chicken math has moved over to the goat arena, somehow always coming home with more than intended LOL). We set the date to get them. Well I get a call that they need to get rid of them a week earlier….. uhhhh, we have no fence up yet! So the hubby and I and a couple of really amazing friends, put up a fence within 5 hours, still finishing it up as the goats are arriving! A little stressful… but them I saw these sweet faces! Not 6, but 8 of them! Including a baby!

This is Twinkletoe – she’s the only mix, Alpine/Nigerian Dwarf.  She is the biggest and also the nosiest!

image

Here are two of the males, Floppy and Brad.  Brad is in retirement. But hopefully Floppy will be ready to be a daddy in the spring.

image

Mr. Mischievious – he lives up to his name.  Also in retirement.  He is very gentle too though.

image

I’ll have to get pictures of all the rest later.  I have learned how to milk them, and on my to do list is learning to make feta cheese and goat milk soap. So if anyone has a fabulous recipe they want to share or do’s/don’t’s they learned the hard way, please feel free to share! I’m a willing student!

On a sad note, during the move we lost all but one of our chickens 😦 Lucy, the Rhode Island Red survived, as did Lola the Turkey.  But the rest all had heat strokes or heart attacks.  I guess it’s from chasing them in 100 degree temps and then transporting them in the August heat. So to replace them we got these 12 Frizzle/Silkie mix chicks!  They are a 10 on the cute-o-meter with their bad hair day feathers!  So cute!

image image

We are REALLY on the path to farming and homesteading now…. if I can just figure out how to get the guys to drink the goat milk!

The Farmhouse, Uncategorized

Next up, Guest Bathroom

While we have a few things left to do in the utility room we went ahead and got started on the kids/guest bathroom.  This is the smallest room in the house, so the challenge is going to be making it still different and cute.  Because cute is the important thing, am I right ladies?  This room is basically 7×9.  So not a tiny bathroom, but not anything luxurious.  We decided to keep things to a minimum in there to still give it a roomy feel.  We are going with a corner shower, no tub.

We started with the “green rock” – ladies this is mold resistant, water resistant sheet rock. Made for bathrooms. So it came this color, I did not paint it 🙂

image

Now one secret about my man.  He can DO anything.  However, he hates plumbing and taping and floating. Especially over his head.  So our next goal was to figure out a ceiling solution (and throughout the whole house we will make this decision) where he wouldn’t have to T&F the ceiling.  We decided on the thick bead board…. I’m in love!

image

Here it it painted Dove White by BM. I’m going to be using that color everywhere I have a feeling.  Then painted the walls Sea Salt by Sherwin Williams.  A color I saw on pinterest and had to try it somewhere.  This picture does not do it justice.  It’s a gray, with a hint of beachy blue/green to it.  So soft and relaxing.

Then we put the flooring down.  Now here’s how house building with the Strong’s goes:

M:You need to decide what flooring you want in the bathroom that’s next.

D: Ok, hmmm (looking online for ideas and pricing) I love this! Heck no I’m not paying that much….. Hmmm this is ok, I might could live with that…. I don’t know…. Uggghhh

M: OK let’s run to Lowes. OK we are not leaving here without flooring so pick something you like.

D: OMG I love this one and it’s on sale! I’ll take it!

Then we get home and love it and that’s that…. So here is what we got.  It’s vinyl planks, because our kids keep the floor wet, laminate or real wood would not have worked. And being on pier and beam, ceramic tile might crack later. So vinyl it was.

And once again, we measured exactly and held our breath as we had part of one piece leftover.  Wasteful we are not!

Next up, beautiful mahogany trim and baseboard that we got FREE, cha ching! Love it when we have free stuff. This stuff came from an old construction site and was just going to be thrown away! Can you imagine??? The horrors that go on around here! One mans trash is another mans treasure….

And my favorite part.  I traded my mom a gorgeous rounded, unique loveseat for this old sewing machine table.  Stripped it down and painted and stained it an WOW, isn’t it the cutest vanity you’ve ever seen??

image

By the way. I got this sink combo with faucet included for $88 on ebay! Score!

We wanted to save room by just putting in a corner shower since the kids are teens and rarely ever take a bath, they can use the master jacuzzi once in a while if they need to soak.  We agreed that this wasn’t our first choice in the looks department, but the price from Surplus Warehouse fit our budget needs at this moment, so it had to work. Here my man, my cousin Tony and father in law Alvin are installing while I try to stay out of their way.

After they finished and left, they hubby and I installed the toilet.  As soon as he scooted out, I couldn’t help myself but to get in there and decorate and put the vanity and shelves in. The water is not ran in there yet, but it looks good, am I right? As long as I can get pictures to share, I don’t mind waiting a few more days for it to be plumbed.  We still have to get a hot water heater though. But I can see long hot showers in our future, which I know we are all ready for! One where you can wash your hair and shave your legs on the same night before the hot water runs out 😉

imageimageimageimageimageimage

The Farmhouse, Uncategorized

Laundry/Pantry Update

So we finally got the pantry shelves installed.  We wanted to do the pipe and flanges style shelves. After looking at Lowes for the materials I thought we might have to back up and punt.  The hardware alone for the 5 shelves was going to be around $200! I’m so frugal and the funnest part of this challenge is to see if we can beat our budget of $30,000 to build this entire house. So we save and barter and bargain shop and dumpster dive for whatever we can to keep that bottom line down.  We still haven’t reached the mark where we would still be saving for the concrete if we had gone with slab!

We scored the 1/2″ pipe for free, borrowed a hand pipe threader and threaded all the pipe ourselves. The flanges were $5-7 EACH at Lowes, I scored them for $2.50 each on eBay. Woohoo! And we got the end caps at Lowes since they were cheap. A bottle of primer and spray paint and some 1×10’s we had on hand, and our pantry shelves for $60!

Can’t wait to get all my baskets and jars and canned goods up there!

The Farmhouse, Uncategorized

Dried in and moving along

I can’t believe I haven’t updated the blog since March.  It’s too easy to post pictures immediately on Facebook and Instagram.  I have to remind myself I need to update the blog to have a complete picture of our dream when we finish.  But even more unbelievable is how much we’ve gotten done since the last update!

Not only are we dried in (well except for the doors and windows) but we are actually doing laundry and in a few short days will be able to shower in the new house.

If you’re just joining us, our goal is to completely finish one room at a time.  Now,  we found out that sometimes we get stuck either on money or decision making or something, and we go ahead and start on the next room as materials and money are available.  So the laundry room/pantry is usuable now but not quite completely finished.

Here’s our progress from April and May:

Those two holes in the middle will be matching french doors.  The window on the right is Ashton’s bedroom and the left window is the master closet.  It all had to balance for the OCD man of the house 😉

image

Since we don’t have contractors to get upset and are not working from blueprints, we decided that the kitchen walls were too tall and would just look strange above the cabinets and shelves.  So we just threw in a loft 🙂  We still get 9 ft ceilings in the kitchen area and will get an open loft for one of the kids to sleep or later on for grandkids to play.  We will also put our computer and office space up there.  It will have open railing banister.  Not sure what we will make it from yet.  Maybe rebar? We will figure that out when the time comes.

image

Those rafters and boards will stay exposed.  They will be White Dove by Benjamin Moore.  We thought about staining but don’t want the dark cabin feeling. We want a fresh, light, farmhouse feel. That is my kitchen you are looking into above. The sink (remember the old farmhouse sink from a previous post??) will go in front of that window.

Next we started on the utility room. Because 15 months doing laundry at the laundrymat twice a week was starting to get old and expensive. So here we go:

I new I wanted a laundry room that was cute, fun and different.  I was drooling over the metal tiles from old hotels.  Looking at Lowes, the tiles were $20+ PER PIECE!  I knew our budget didn’t allow that so I started looking online.  I found http://antiqueceilings.com/ – and WOW! Not only was it SO much cheaper (like $2.50-$4.50 per piece depending on your taste) but fast delivery and excellent customer service.  So we ran some lads (lats??), I don’t know…. thin strips of wood…. across the ceiling and put thin sheetrock up.

image  
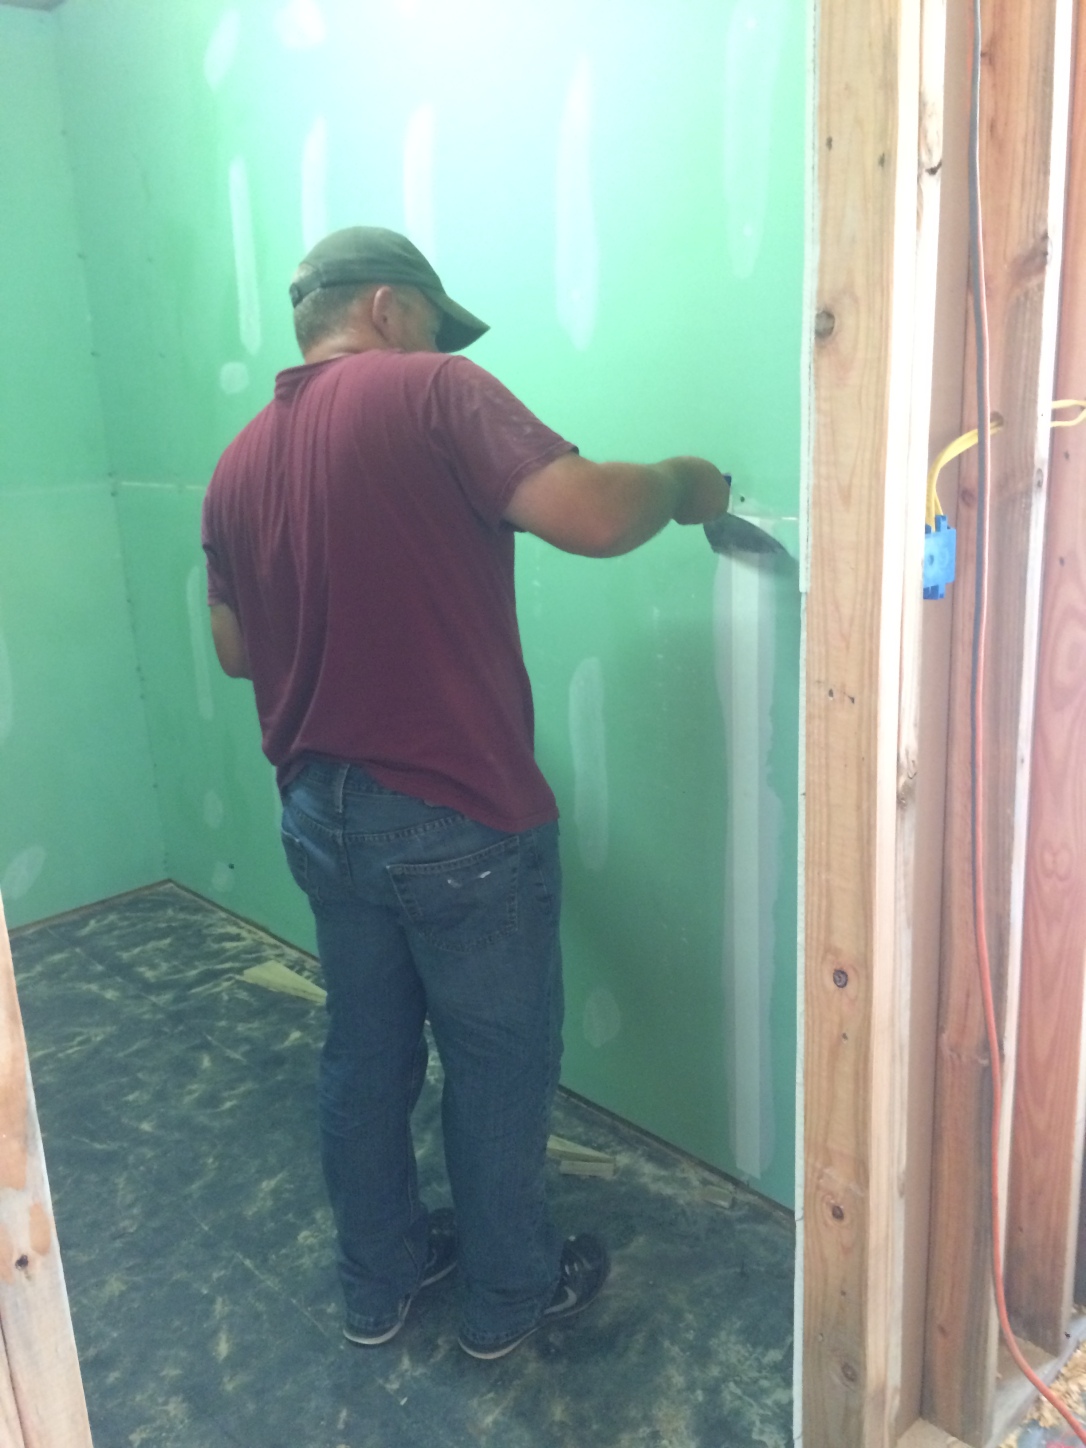
No need to tape and float because the tiles are installed with adhesive and stick instantly!  Michael calls them our take out box tiles.  I call them beautiful!  Seriously though, they do feel like a take out box.  They are very fragile, fingernails can dent them, but man once you get them up there it’s amazing!

image

And that chandelier has been following me around, move to move, for about 10 years.  I found it somewhere for like $10.  I knew it would have a special role in it’s lovely life somewhere, and with a little scrubbing and some spray paint, voila!

Next up was to find the perfect paint color.  Michael used to hate my paint chips. I would grab hundreds of cards of varying shades of the same color.  He would cringe and lead me away from the paint aisle every time we would go to Lowes, which is basically a weekly date. So I got smart and bought one of those cute little Benjamin Moore books that have tons of samples in it.  I found the perfect turquoise that wouldn’t be so bright and trashy, it actually is a Valspar color, Gypsy Blue. It matched the wallpaper I picked out, more on that story later, and the chandelier so I got it.

If you’ll check out that “crown moulding” that he is installing, we made an amazing discovery.  You can actually buy strips of wainscotting that is tongue and groove for like $15 for a pack of 6 8ft pieces.  If you take them apart they make great baseboard and crown! We had to build a little contraption to make it fit just right because of the gap in our flooring. But my man is a genius and figured it out.

image

He built this little piece to go along the edges and nail the trim to!

Oh and did you see my floors above? I love it.  It’s laminate or hardwood, I will never understand, to me, hardwood is WOOD, not snap together pieces.  But anyways, when we calculated the square footage of the room it came out to be EXACTLY 7 boxes of the stuff.  We ordered the 7 boxes and prayed it would work out.  We had part of one piece left over! It was a miracle!  BTW if you are curious, it is Frosted Maple by Allen+Roth from Lowes.

Now the wallpaper story – do you know how hard it is to find wallpaper in a store these days??? Nearly impossible.  So I went online, seeing what I wanted in my head. Not being able to find it in my price range.  Even the cheap wallpaper is expensive!  But I found one that I thought “would do”. It looked more green than I wanted but oh well.  Well it arrived and I was thrilled that it was the exact color I wanted.  Michael wasn’t thrilled with the pattern and bet me $20 that in a year I would be tearing it down.

He was anxious about hanging the wallpaper. I think he doubted my skills, because I don’t have “that” many skills LOL but once we got it on the wall he admitted that he did in fact like the wallpaper 🙂  We are putting pantry shelves on the wallpaper area soon.

Every laundry room (that leads to outside anyways) need a mudroom bench and I was drooling over the ones on pinterest.  I came home one day and Michael had made me one from scraps we had laying around. I guess he didn’t want a nap that day and felt like working 🙂  He came up with this beauty!

I got the hardware from eBay and decorated it with some treasure from both our our grandparents and some items from our wedding.  It’s perfect!

Then we got the washer and dryer hooked up and running (I swear we heard angels singing as we all, including the kids, watched the first load go in):

image

Then all that was left was the folding table.  Again from scraps we had laying around.  I swear this man is a genius! Genius I tell you!

Now all that left is to put up the shelves, build a shelf over washer & dryer and install the sink beside the washer. I’ll post the finished picture as soon as we finish it!

And that’s the story of how the laundry/pantry was completed.  Stay tuned for the bathroom update.


Uncategorized

Beams, beams and more beams

Last weekend we got the rest of the rafters up. We just keep looking at it and can’t wait to move in! We got all the beams up. It was even more beautiful than what we imagined and hoped! We couldn’t have done it without the help from some family and friends.

Tony was designated climber

Thanks to Jesse, Jonathan, Michelle and of course Daddy Strong

We also decided we are going to put a loft above the kitchen for an extra bedroom/office. That’s the best part of doing it like we are. We can add anything at anytime.

The rafters and planks will be exposed and painted an antique white. The dark edges are live edges from the trees.

And our finished product for the weekend …

Painting Furniture, Uncategorized

First big paint job

Not the house.  But I have about 3,741 things that I want/plan to repaint before we move in to the house.  2 beds, 5 dressers, a bathroom vanity from a dresser, 2 mirror, 2 armoires, antique china hutch, coffee table, dining room chairs, antique vanity, 2 end tables…. wow, my list is even longer than I thought.

Being in a creative mood last week, I decided to play with some chalk paint and play with one mirror.  I just used the paints I had on hand to practice.  I really ended up loving the finished product even though it didn’t match my color scheme for the bathroom, I guess I will change the bathroom to accommodate my craftiness 🙂

I got two of these beauties from the historic Fredonia Hotel when they sold everything during their remodel. Not bad for $30! They are huge!  Next time I’ll try to take pictures during the process.

Basically I lightly sanded the frame.  Applied a chalk paint that I got from an antique store in Lufkin a couple of years ago and never used.  Then I went over it in spots with an antiqueing wax made by the same brand.  CeCe Paint I believe.  Then as it dried I dry brushed over spots with a mostly dry brush dipped in the first paint, to make it look better. Then I put a finish wax on top to seal it.

Now I just have to paint one more mirror to match it and the dresser that will become a double vanity.

BEFORE

IMG_0123

AFTERIMG_0126


The Farmhouse, Uncategorized

It’s looking like a house

It’s been a while since we updated our progress.  With the slow down in the oil field we’ve been short on money for a while, so we’ve just been tinkering around with electrical stuff, clearing more trees and stuff around the land.  But we got a surprise and a kick in the butt a few weeks ago when another of our kids decided to move in full time.  The travel trailer is perfect for two people. No problem.  We added one kid full time and it got a little more crowded, but manageable. Now with 4 people in there every night, the trailer has seemed to shrink! So we kicked Project Farmhouse into high gear.

I missed updating our December progress. So here is what we got done in December and early January:

The rafters on the kids wing went up.  You will be able to see the exposed rafters in the utility room and both bedrooms.

IMG_0773IMG_0779

The 4′ pony wall that makes a beautiful 12 foot wall in the living room:IMG_0781IMG_0782

This room is our awesome utility room/pantry.  The kitchen will be just to the right of this room.IMG_0783IMG_0784IMG_0785IMG_0790IMG_0791

Look at that handsome man balancing on a 2×4!IMG_0793

Added decking and tar paper to that side on the roof. Just waiting for the metal roof now.IMG_0798

Last weekend we really got rolling.  We decided not to put the adult wing on hold. We are doing the whole house… after putting the subfloor down on our wing, we started framing the rest of the house.  We had an extra helper this weekend, Aaron put in a long hard days work.IMG_0799

The 3 Strong men working together 🙂IMG_0801

Father and son.  And check out our awesome chicken pen in the background! Now imagine English ivy growing over the top and down the sides, it’s going to be stunning!IMG_0804

There will be two french doors in these big openings.You are looking into the living room/dining room/kitchen area here. The kitchen will be along that back wall.IMG_0806

Kitchen wall – big window opening is where the sink will go so I can keep an eye on my chickens 🙂IMG_0807IMG_0808IMG_0810IMG_0812

And here to the left is our master suite side. No kids allowed! Though when Brayden and Ashton saw our bathroom and shower, they’ve decided they need to use our bathroom every night.  I see a deadbolt on our bedroom door in the future! LOLIMG_0813

Master bedroomIMG_0815

One of my favorite parts of our last minute redesign.  A private porch leading from our bedroom. I think we will spend a lot of time out here. Again – no kids allowed!IMG_0816

One more look at our living area. I’m already painting and decorating in my head.IMG_0818IMG_0155

Not bad work for 2 days.  And it’s really looking like a house now. Thanks for looking!IMG_0161

The Farmhouse

And the walls came up!

IMG_0024

Last weekend we got some great expert help. Michael’s dad came over for a few hours to help us start framing. Daddy Alvin has worked in construction all his life, still remodels a popular department store all across the country. We only have his help until January when he heads back out on the road to North Carolina for a job.

Michael needed a quick refresher and I learned the difference between a corner and a T.  I also learned the difference between box framing and stick framing. I feel so smart now!

Here are my guys box framing the first wall:

IMG_0008 IMG_0007 IMG_0006

Making sure to frame out the doors and windows:

IMG_0004 IMG_0002

Making sure everything is plumb and level and square.

IMG_0010 IMG_0014 IMG_0013

And the first wall is up!

IMG_0012

Now for the second wall:

IMG_0018 IMG_0020 IMG_0022

And after about 6 hours we managed to get the kids wing completely framed! This is two bedrooms, a bathroom and utility room/pantry. Good job guys!

20151123_072146 IMG_0025

It’s so exciting to be able to walk into a room and say OK this can go here and this can go here, gonna need electrical outlet here and there…..Any crazy or clever ideas you wish you had done with electrical plugs and outlets? Let us know in the comment section, we still have time to make sure we get everything done.

Homesteading

Chicken Coop from Recycled Fencing

533400_369257183131985_840275039_n

So back in April I was ready to get back in the chicken business.  I had raised as many as 35 laying hens at one time over the past few years, but due to living in “town” at the time, my chicken dream had to be put on hold.  Moving out to the country we now have the space for lots of things and knowing how easy maintenance chickens are, not to mention the delicious flavor of the fresh eggs, my husband set to work making my wishes come true.

Now in the past I had built a precious little coop, having no knowledge of building anything, a limited college experience of using power tools. In fact my coop was at the beginning of the urban chicken craze and the local womens magazine even featured my coop in an issue!  I tell my husband (I built the coop pre-Michael) that I built it “girl style” – Oh this board is 8ft? Then this wall will be 8ft. It didn’t have a floor, it had a screen door because that was easy to attach hinges too. Nothing fancy. But it WAS turquoise and it DID have a chandelier inside for my chickens.  And it kept the critters out.

740734_462364850487884_990284634_o

Fast forward 4 years later, and my husband knocked my socks off with this adorable little schoolhouse coop, just in time for our chicks to arrive. Now this isn’t the latest picture of it because I decided on the spur of the moment to blog this, but I will get more pictures from the update soon.

This coop was made with almost all recycled materials – old fence posts we had from when we tore down a hot tub fence, old metal roofing we had laying around, old posts from my old coop. We bought a few new 2×4’s, wire and hinges.  That’s about it.

This little cutie has 6 nesting boxes and will easily house 2 turkeys (somehow they still squeeze in) and probably 20 grown hens if we put up more roosting poles.

FB_IMG_1429536683747(1)

Well, we raised 30 birds from baby chicks, including 2 turkeys.  My goal was to let them free range once they got several months old, all their feathers and could take care of themselves. We butchered the 3 Cornish Cross hens (that’s a whole nother post).  Between the hawks, the raccoons and one little chicken-killing-chihuahua/shitzu mix puppy we are now down to 4 hens – 2 Easter Eggers, 1 Cuckoo Maran and 1 Rhode Island Red, and 2 turkeys, Beyonce’ and Lolita.

We ordered more of the Cornish Cross chicks in October because they are seriously the most beautiful chicken meat I’ve ever seen.  I found this great hatchery out of Oregon. They really have the best customer service PLUS they sell chicks year round, which my regular hatchery of choice doesn’t. So Jenks has a new customer for life!

We free range and use feed to supplement with no added hormones or antibiotics.  Just good yard bird.  After losing several of those chicks to the aggressive turkey pecking through the kennel at them, we are down to 13.  Michael decided the babies need their own grow out pen and I can home one day to this little Chicken Condo.


IMG_9851

IMG_4742

IMG_4427

In December we will butcher these babies.  I’ll share the info then.

The Farmhouse

Subfloor – Check!

It’s so encouraging when our friends ask us why we haven’t had an update in a long time.  I love that someone is actually reading this blog 🙂 So here is the update.  We had to save a couple of months for the subfloor and by the time we had the money, the rains came and the rains came and the rains came…. So it put off progress. But we finally worked our tushes off in the couple of days we had sunshine and got our subfloor down and protected.

plastic wrapped

We used 3/4″ OSB tongue and groove plywood. Covered it with roofing felt paper then covered that with contractors plastic. We will cut the plastic out after we get the roof on.

We have made an executive decision to only finish 3/4 of the house right now. We changed our roofline which makes it possible for us to build one side of the bedrooms and our main living area now – about 1,440 sq ft of the 2,000 plan – and live in that portion while finishing up the other side which includes the master suite and another bedroom.

Here are our plans:

plans

As you look at it – the front doors are at the top of the pic. We will have double french doors at the front of the house. The bedrooms, bathroom and utility room to the left are what we are working on first, as well as the main living area which is an open floor concept.

To give you an idea of how the roof line will make this job easier, here is our inspiration for the outside of the house, just imagine no porch, it’s all enclosed:

IMG_2068

So as I said, we got all the plywood subfloor laid…. in about 2-3 hours! I was shocked how fast that went! My sweet husband is a pro at this, I’m just amazed watching him work.  As I’m sure he’s just as amazed watching me fall through beams, misfire nail guns and trip over anything not nailed down, and some things that ARE nailed down.  But he just shakes his head and keeps working.  Sweet man ❤

I thought I would post some of our inspirational pictures that we are taking note of. This house is going to be so unique and “us” but here’s some of our ideas:

This is the main living area and exposed rafters and ceiling we are going for:


WEBPAGE_20150309_212555

This is what we are thinking for cabinets and island look.  Probably fence pickets or pallet wood.

d67e28270e438e778e844d009db6760b

Of course I want these floating shelves that Joanna Gaines from HGTV’s Fixer Upper has made me fall in love with.

shelving

We are going for a primitive, farmhouse, shabby chic look so of course the nice new stainless steel appliances just wouldn’t look right.  So we found these 1950 stove and refrigerator that we got for a steal! Now use some imagination before you turn your nose up at them:

100MEDIA$IMAG0454_1 00M0M_10ZMNEsrUxa_600x450

We also got this great sink from my dad that has been sitting out in his yard for years:

WEBPAGE_20150509_125100

We are going to have all of them (I haven’t told Michael yet, but WE may be doing this ourselves, I like a challenge) repainted with this color:

5797256df0d6aaca7a3ba639c72a3952

So they will look something like this:

13f76137fe9b6a58394ddedef8563226

I think it is just going to be precious 🙂 I can’t wait!

I know some people think we are crazy. Believe it or not we have been chastised that we are taking too long or that there is no way one man and woman and teenager can pull this off without alot of help from others or hiring help.  And I know several more are thinking it, but are kind enough not to say it out loud to us, but in the words of John Locke from “Lost” – “Don’t tell me what I can’t do……” because we CAN do this and it’s going to be awesome!

Thanks for stopping by….. – Donna & Michael

The Farmhouse

Progress! We have a floor…. sorta

As we explained this is a slow process because of how we are trying to build this home and still be financially free. But we now have the next stage done. Floor joist!

20150804_192835

We had some good help from all the kids, from unloading the lumber from the trailer to helping screw and level every single board.

20150804_192627

20150804_194017

20150808_191945

The next step is running all the air conditioning duct, then on to the plywood sub floor. Then it will start to look like a house instead of a huge dance floor. Though, now that I’ve mentioned that and it’s in my head,  I may have to get Michael out on the sub floor while we have it and let him twirl me around a little bit 😉

Thanks for looking and keeping up with the Strong’s.

The Farmhouse

Getting Started

Well last weekend we finally started seeing progress. After several weeks of walking around holes 2 ft deep and 12 inches in diameter, one kid falling in the hole and one chicken drowning in a water filled hole, we finally got the holes set with our 4×6 posts.  The kids helped empty the holes of the rain water that had collected.

2015-07-13_08.41.50     2015-07-13_08.42.36    2015-07-13_08.43.14

Then we had to run string to get everything squared.

 2015-07-13_08.39.44 

Michael and Brayden mixed and poured the quickcrete.

 2015-07-13_08.41.05     2015-07-13_08.47.33      2015-07-13_08.46.38  

Next it was my job to set the posts and make sure everything was level.

 2015-07-13_08.45.48    2015-07-13_08.43.49

A few of our posts were from the barriers you see on the side of the road with the little cables running through them.  Most came from old telephone poles.  We managed to get all the poles and posts FREE! We paid the Runquist Sawmill out of Mt. Enterprise (Tell Troy we sent you if you need a sawmill guy, he’s great to work with).  We used about 20 bags of quickcrete to set all 30 holes.  These posts aren’t going anywhere! So basically with all our scavenging, renting a post hole digger and setting the posts, our running total to set the foundation was less than $350. Not bad I think.

All set and leveled.

2015-07-13_08.39.08    2015-07-13_08.36.09

Next we are ready to put the floor joists on.  Stay tuned…

The Farmhouse

Real Hardwood Floors

We got the news today. Our giant tree is cut and ready for pickup!  Here it is on the saw…. BEFORE

imagejpeg_0(1)    imagejpeg_1(1)

Here are some of the pieces…. AFTER

20150709_095237

We have enough wood from that one tree to do the floors in our open living room/dining room/kitchen area! That is $0.66/sq ft! That is a heck of a deal on hardwood flooring. We will have to tongue & groove it ourselves.

Now to decide if we sand, stain and seal, or just sand and seal. I’m thinking maybe a thin layer of driftwood gray stain to still see the beautiful grain from this water oak. Any comments or suggestions?